
Today we’ll explore how to use a $170 Chromebook, vim, tmux and Amazon Lightsail to do Ruby on Rails, PHP, and Javascript development.
Background
I purchased a Chromebook about a year ago for our family’s casual computing needs, such as web browsing and Google Docs from the comfort of our couch without the sweaty lap that comes from the use of a traditional laptop (or the pricetag!), while still having standard-sized keys. Most importantly, a Chromebook required absolutely minimal technical effort on my part; even if one of our kids tosses it into the bathtub, we could simply have another unit shipped for a reasonable price, log in, and pick up right where we had left off (after dealing with the bathtub incident, of course).
Then I decided I’d like this same level of convenience for my work life as a software engineer: I wanted to web development from my Chromebook, but with the following requirements:
- Language-agnostic: I need a reasonable setup for developing PHP, Ruby on Rails, Javascript, and HTML/CSS in the immediate term. The solution cannot be language-specific, though I have no immediate interest in the Microsoft languages.
- Bathtub Test: if the device is destroyed, I need to be able to pick up where I had left off with minimal effort.
- Debugging: I need to be able to debug code, and none of this
var_dump()nonsense. We’re professionals, not savages. - Pricetag: The solution needs to be reasonably priced, if not free. I’d prefer to spend time upfront tinkering and working out a clever setup than to shell out money for a sub-optimal pre-packaged setup, though I need to spend a little cash then so be it.
- Comfy Factor: No list of requirements is complete without a subjective, immeasurable requirement: this needs to feel like a comfy development environment. I’ll only have a single screen that has low resolution, which is in stark contract to my dedicated office complete with a mouse, external monitors, and a sound system. The software will need to compensate, especially for the lack of a mouse and monitor real estate.
- Chair Hopping: This is a soft requirement, but I’d like to be able to shift between my office machine and the Chromebook, picking up right where I had left off - even in the middle of an active debugging session.
Our final solution meets all of these requirements.
The Solution
My immediate inclination was to use a Cloud-based IDE, such as CodeEnvy or Cloud9, but after trying each for a week or so they failed my Comfy Factor and Debugging requirements. Another option I explored was local development, but this failed Bathtub Test, Comfy Factor, and Chair Hopping.
Finally though, I’ve landed on a combination that meets all of my requirements, using Amazon Lightsail, Vim, and Tmux. I know what you’re thinking: “Vim? VIM?!? Do you live under a rock? The mouse was invented decades ago! Next thing I know you’ll be telling me to use the Dvorak keyboard layout because QWERTY was specifically designed to be anti-ergonomic.” And to that I say: don’t be silly. If you switch to Dvorak then you’ll have a hard time helping your Grandma remove malware from her decade-old PC because it uses the same keyboard layout as everyone else.
Now, as for that Vim thing, it actually makes a lot of sense on paper: it’s language-agnostic, highly-customizable, and significantly more comfy on a Chromebook than a mouse-oriented GUI because you won’t be using the trackpad. Furthermore, it supports all of the features I expect from a modern IDE, such as auto-completion, auto-indentation, fuzzy file search, fuzzy text search, git integration, code linting, spell-checking, syntax highlighting, copy/paste, code-completion, code snippets, and all of the language-specific integrations you’d expect.
Plus, vim is everywhere. I can’t tell you how many times I’ve watched a developer SSH into a client’s web server and struggle with even the lightests of tasks because they can’t cope without a shiny GUI. Don’t get me wrong: there is a moderate learning curve and Vim pretty much requires that you have a deep appreciation for minimalism. The most difficult part of this whole solution is learning Vim, but it’s worth the investment.
I’ve already gotten too far into the weeds; let’s pull back out and get into setting up this beast.
The Setup
Setting up Lightsail
Amazon Lightsail is essentially Amazon’s answer to DigitalOcean: they provide a virtual private server (VPS) that’s very affordable (starts at $5/mo) and sports an easy-to-use interface. Despite being very familiar with many of Amazon AWS offerings and being no stranger to bare-bones systems administration, sometimes it’s nice to just click a button and have an environment.
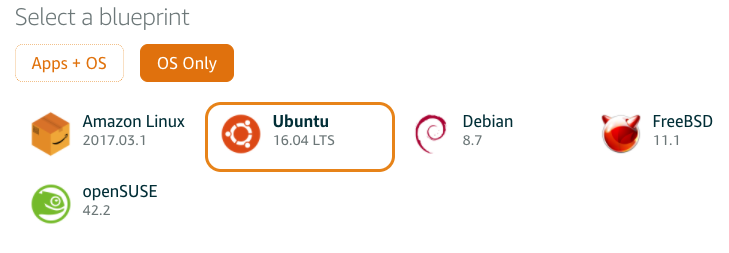
Lightsail provides a number of “blueprints” (preconfigured server images for specific use cases) for common software stacks such as LAMP and MEAN, application platforms such as Drupal and Magento, and barebone OSs such as Debian and Amazon Linux. Since this instance will serve as a general PHP and Rails development environment we’ll go with a barebones Ubuntu (16.04 LTS) blueprint.
Once you’ve set up your server, download the corresponding SSH Keypair from the account page. It’ll be named something like LightsailDefaultPrivateKey-us-east-2.pem. Also, find the IP address of your Lightsail instance and make note of it. You’ll need these soon.
Setting up the Chromebook
The .pem file given to us by Lightsail is the private half of the keypair we’ll need to authenticate to our server; we need to generate the public half of the pair. To fix this, we’ll need to enable Chrome’s Developer Mode, which will allow us to run the necessary commands. Be warned: turning on Developer Mode will reset your Chromebook to factory settings, which wipes out local storage. This would be a good time to make sure your Google account syncing is set up. If this is an issue for you, then you may consider converting your .pem file on another machine and then transferring the necessary files to your Chromebook.
Enable Developer Mode
(Hint: if you’re reading this on the same machine on which you’ll be performing the steps, then you may want to write the steps on a scratchpad.)
First, we’ll boot the Chromebook in Recovery Mode by holding down the Esc and Refresh (F3) keys and then tap the Power key.
Your machine will reboot, and you will be presented with a recovery screen. Press Ctrl-D.

You’ll then be asked if you’d like to turn off OS Verification. Press Enter.
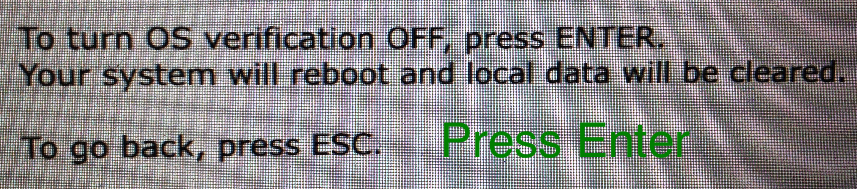
The Chromebook will then go through its installation process, which will likely take a few minutes. Note: when you reboot (and every time you boot), you’ll be told that OS Verification is off and that you can press the spacebar to re-enable it. Do not press Space.
Convert our SSH Key
Press Ctrl-Alt-T to open up a terminal tab, then use the following commands to take care of your SSH keypair (replacing MYKEY with the name of the file you downloaded from Lightsail earlier:
cd ~/Downloadschmod 400 MYKEY.pemssh-keygen -y -f MYKEY.pem > MYKEY.pubmv MYKEY.pem MYKEY

Next, do yourself a favor and store the .pub key you just generated somewhere other than your Chromebook, even if this just means emailing it to yourself. If you ever decide to take your Chromebook out of Developer Mode (or, like my kids, someone in your household doesn’t know not to press Space when it’s starting up…), you’ll be able to skip over the whole Developer Mode section the next time you want to set this up.
Install and configure SSH Client
Install the Secure Shell extension. This is highly-preferred over the built-in SSH client in Chrome because of the Comfy Factor requirement.
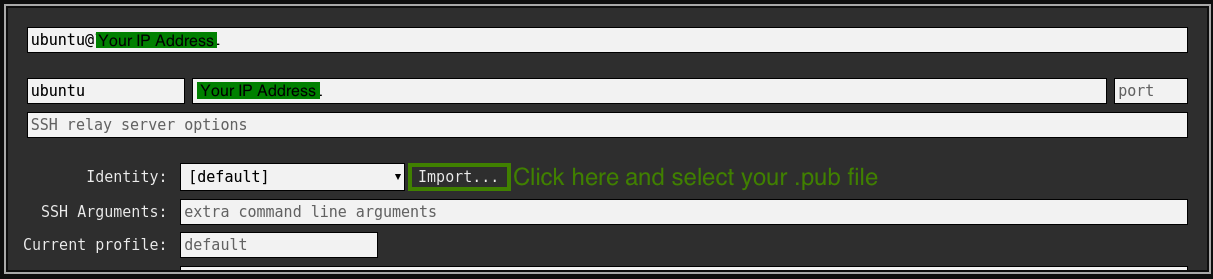
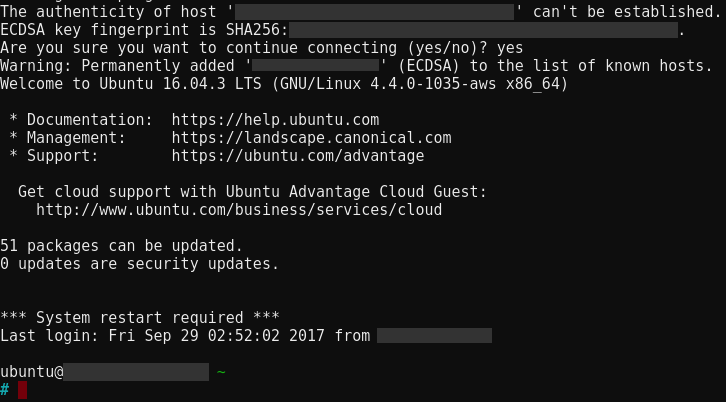
Next, fill in the connection info using ubuntu as the username and the IP address you recorded from Lightsail earlier. Then click on the Import... link and select your MYKEY.pub file. Press Enter to connect to your server.
Install our IDE
To install vim and tmux, run the following command: sudo apt-get install -y vim tmux tmuxinator git. Alright, maybe it doesn’t deserve the distinction of “IDE” quite yet, but that’s all there is to our initial installation.
Using the Environment
This will not be an exhaustive tutorial on vim and tmux, but I’ll do my best to give you a little taste and then point you in the right direction. Well maybe not the right direction, but I’m going to point you in a direction. Think of this like a buffet where I point out a handful of dishes I prefer, but important that you follow your nose, and don’t hesitate to go back up for seconds. And thirds. Then a nap.
Like my kids eating cake, we’re going to start with the frosting first. That is to say, from the outside in: we’re going to take a look at our window manager.
Tmux: Our Window Manager
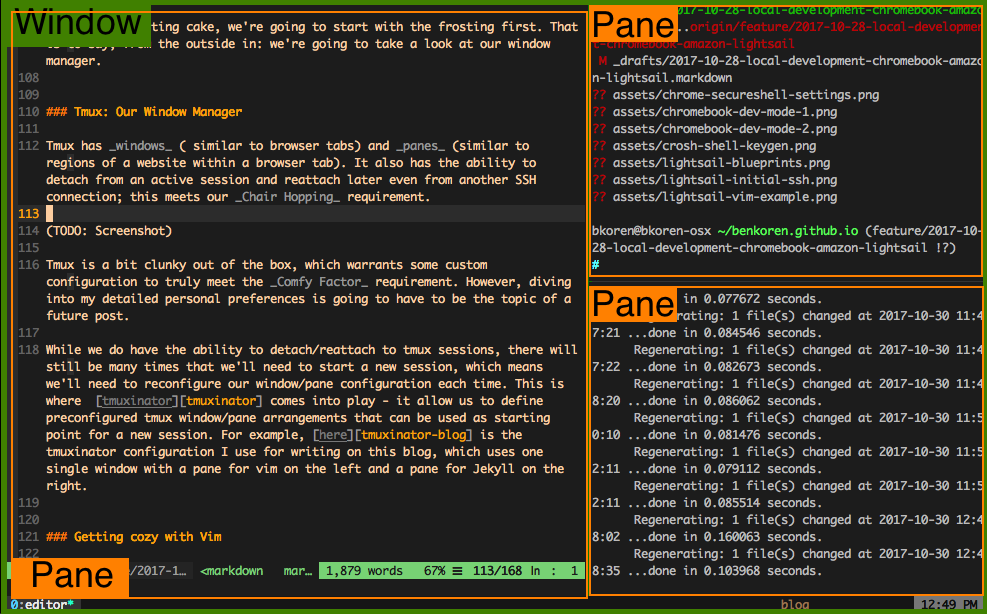
Tmux has windows ( similar to browser tabs) and panes (similar to regions of a website within a browser tab). It also has the ability to detach from an active session and reattach later even from another SSH connection; this meets our Chair Hopping requirement.
Tmux is a bit clunky out of the box, which warrants some custom configuration to truly meet the Comfy Factor requirement. However, diving into my detailed personal preferences is going to have to be the topic of a future post.
While we do have the ability to detach/reattach to tmux sessions, there will still be many times that we’ll need to start a new session, which means we’ll need to reconfigure our window/pane configuration each time. This is where tmuxinator comes into play - it allow us to define preconfigured tmux window/pane arrangements that can be used as starting point for a new session. For example, here is the tmuxinator configuration I use for writing on this blog, which uses one single window with a pane for vim on the left and a pane for Jekyll on the right.
Getting cozy with Vim
If you’re completely unfamiliar with Vim, this interactive tutorial is a good place to start. To really get Vim humming though, you’ll need some plugins. Here is a reasonable plugin directory to thumb through.
Again, I’m going to avoid detailing my personal preferences today, but feel free
to reference my dotfiles repository for some reasonable defaults. As
of this writing, the vim plugins I use are in /vim/.vimrc.bundles:
" Theme
Plugin 'morhetz/gruvbox'

" Plugins
Plugin 'vim-airline/vim-airline'
Plugin 'vim-airline/vim-airline-themes'
Plugin 'tpope/vim-fugitive'
Plugin 'tpope/vim-endwise'
Plugin 'tpope/vim-repeat'
Plugin 'tpope/vim-rails'
Plugin 'tpope/vim-vinegar'
Plugin 'tpope/vim-surround'
Plugin 'tpope/vim-markdown'
Plugin 'airblade/vim-rooter'
Plugin 'airblade/vim-gitgutter'
Plugin 'vim-ruby/vim-ruby'
Plugin 'pangloss/vim-javascript'
Plugin 'ap/vim-css-color'
Plugin 'JamshedVesuna/vim-markdown-preview'
Plugin 'jiangmiao/auto-pairs'
Plugin 'scrooloose/nerdcommenter'
Plugin 'ntpeters/vim-better-whitespace'
Plugin 'Powerline/powerline'
Plugin 'vim-scripts/BufOnly.vim'
Plugin 'rizzatti/dash.vim'
Plugin 'embear/vim-localvimrc'
Plugin 'craigemery/vim-autotag'
Plugin 'majutsushi/tagbar'
Plugin 'diepm/vim-rest-console'
Plugin 'duff/vim-scratch'
Plugin 'mxw/vim-jsx'
Plugin 'pgilad/vim-skeletons'
Plugin 'SirVer/ultisnips'
Bundle "honza/vim-snippets"
Plugin 'junegunn/fzf', { 'dir': '~/.fzf', 'do': './install --all'  }
Plugin 'junegunn/fzf.vim'
Plugin 'Shougo/neocomplete.vim'
Plugin 'w0rp/ale'
Plugin 'godlygeek/tabular'
Downsides
This solution is not without its downsides.
First of all, this solution degrades significantly as network latency increases, and is completely unusable the offline. One of the biggest advantages of using Vim is that once its use is committed to muscle memory, it’s extremely fast. However, when you’re using it over SSH and have a bit of network latency, the screen does not keep up with your typing. To be honest, this alone is enough reason for me to ditch the approach entirely.
Debugging is not nearly as good as when you’re in an Eclipse-based IDE. When developing in Rails, byebug is passable, but pales in comparison to Eclipse. PHP flat-out fails our Debugging requirement as far as I’m concerned.
Doing development on a machine with a trackpad rather than a mouse is fatiguing at best. Even if we’re using vim, which doesn’t require use of the mouse, we still need to use a web browser.
Another downside I’ll mention is the ergonomics of keybindings, that is, which
keys map to which functions in Vim and Tmux. The default key mappings are often
not very ergonomic. For example, Tmux’s control key is Ctrl-A by default.
Given how frequently the command key is used, I remapped this to the tick/tilde
key (`), which is much easier to access. The problem with this is how dependent
this setup is on muscle memory – the longer we wait to rebind a key, the more
engraind a potentially non-ergonimic configuration is. This is why I recommend
keeping an eye out for every opportunity you have to rebind from the very day
you start using vim/tmux; it won’t take long for it to become too cumbersome for
you to want to change.
Last, but not least, the keybindings. Maybe I’m just getting old, but it’s difficult to remember them all. Much like the earlier days of Minecraft when you’d need to have a Wiki open just to play the game, I need to have my cheat sheet (and google) handy to get things done. Every day I get faster and need to look up functions less, but the learning curve is real.
Further Reading
You can find additional plugins for Vim at the [VimAwesome][vimawesome] site. If you ever need to record a screencast of a terminal window, ascriinema is a neat solution. I went with Vim, but I hear good things about Spacemacs as well.
As long as I’m pushing the console applications on you, Org mode is another one to take a look at: it’s “for keeping notes, maintaining TODO lists, planning projects, and authoring documents with a fast and effective plain-text system.”
I’m currently using bash because that’s the default for most of the operating systems I use, but I’ve heard that Oh My Zsh is a worthy successor.